
Calculating NDVI from Sentinel-2 Images

Let's start with the introduction:
What is NDVI (Normalized Difference Vegetation Index)?
The Normalized Difference Vegetation Index (NDVI) measures the difference between near-infrared (which vegetation strongly reflects) and red light (which vegetation absorbs) to quantify vegetation. NDVI always ranges from -1 to +1. If there are no green leaves, the value is zero. A zero denotes no vegetation, whereas a value close to +1 (0.8-0.9) suggests the highest density of green leaves conceivable. However, the land cover type does not have its specific limit of NDVI values.
Normalized Difference Vegetation Index (NDVI) Formula:
The formula for calculating NDVI is as follows:
NDVI = (NIR — RED)/(NIR + RED)
NIR – reflection in the near-infrared spectrum
RED – reflection in the red range of the spectrum
The output range of NDVI calculation typically varies from -1.0 to 1.0.
Normalized Difference Vegetation Index (NDVI) value range = -1 to 1
Compared to other wavelengths, healthy vegetation (chlorophyll) reflects more near-infrared (NIR) and green light. It does, however, absorb more red and blue light.
Calculation of NDVI for Sentinel 2 in Google Earth Engine (GEE):
Google Earth Engine is a better platform for calculating time-series NDVI from images. I will be showing the calculation and visualization of NDVI with python API in the Jupyter lab. You will be able to find the code demonstrated on Github as in the previous posts.
Code Section:
Let's dive straightly inside the code:
- Import the Module and authenticate google earth engine
import geemap, ee ee.Initialize() - Define area of interest for the computation of NDVI
# get our Nepal boundary aoi = ee.FeatureCollection("FAO/GAUL/2015/level0") .filter(ee.Filter.eq('ADM0_NAME','Nepal')).geometry() - Define function for EVI computation
def getNDVI(image): # Normalized difference vegetation index (NDVI) ndvi = image.normalizedDifference(['B8','B4']).rename("NDVI") image = image.addBands(ndvi) return(image) - Define the date for image
def addDate(image): img_date = ee.Date(image.date()) img_date = ee.Number.parse(img_date.format('YYYYMMdd')) return image.addBands(ee.Image(img_date).rename('date').toInt()) - Filter image collection and compute the NDVI for each image
Sentinel_data = ee.ImageCollection('COPERNICUS/S2') \ .filterDate("2022-03-01","2022-03-31").filterBounds(aoi) \ .map(getNDVI).map(addDate).median() - Define color pallate for NDVI
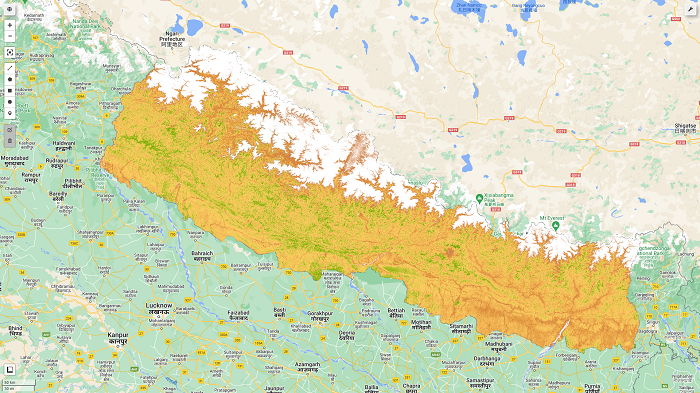
color = ['FFFFFF', 'CE7E45', 'DF923D', 'F1B555', 'FCD163', '99B718', '74A901', '66A000', '529400', '3E8601', '207401', '056201', '004C00', '023B01', '012E01', '011D01', '011301'] pallete = {"min":0, "max":1, 'palette':color} - Visualize the result with follium
# initialize our map
map1 = geemap.Map()
map1.centerObject(aoi, 8)
map1.addLayer(Sentinel_data.clip(aoi).select('NDVI'), pallete, "NDVI")

map1.addLayerControl()
map1
We will obtain the final map as shown in the figure below. Further interpretation and values extraction for the sample points will be explained in the next post.
The Github link for code is:
https://github.com/krishnakafle/Blog_kaflekrishna/tree/main/GEE/NDVI
0 Comments